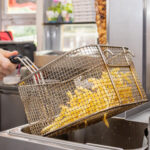
Gastroart.ro and dacris.mt recommend Henny Penny open or pressure fryers . Today we’re presenting the five mistakes you can avoid when frying food.
#1 You’re Using the Wrong Fryer
If you’re not using the right cooking equipment, none of the following points will matter much. Knowing the differences between an open fryer and a pressure fryer, or knowing when to use a standard fryer versus a small-capacity one, are very important factors that can take a business to the next level.
Open Fryer vs. Pressure Fryer
Although you can cook in any type of fryer, some fryers are better suited to certain dishes. Open fryers are the standard in every kitchen, mainly because of their flexibility. Breaded or unbreaded dishes, meat, vegetables, and especially French fries can all be fried perfectly, with a delicious crust, in an open fryer. Pressure fryers stand out when frying larger cuts of meat and bone-in pieces. The science behind pressure frying is sealing the moisture inside the meat and then cooking the food in its own juices. This cooking method results in juicier, tastier dishes. All types of meat can be prepared, from chicken to pork or even filet mignon, and cooking time is reduced by 30% compared to frying in an open fryer.

Fryer Size
Once you’ve decided which type of fryer better suits your needs, you need to decide on the fryer size that matches your current and potential needs (customer orders). This can be done in several ways. A few things to consider: how many vats you need, what size those vats should be, and how often the oil will need to be filtered.
For open fryers, the traditional ones have a capacity of roughly 22-30 kg per vat, an important feature for anyone using heavily breaded products. These high-volume fryers are also excellent for deep-fried dishes and for cooking several types of products at once, as long as you’re not worried about the flavors mixing.
New open-fryer technology uses a reduced amount of oil, around 14L, and has eliminated what’s known as the “cold zone”, the spot where residue and crumbs collect and stay cool. Removing the cold zone means you need to clear out crumbs more often, so they don’t burn. It also means more frequent filtering cycles, which can take between four and six minutes and can happen between cooking sessions. With newer fryers, this maintenance cleaning is done quickly, halfway through the oil’s usage life, allowing you to maintain output while also using 40% less oil.
For pressure frying, the difference in vat size depends on the number of meat pieces you’re preparing at once. For chicken, for example, there are vats with capacities of 32, 48, or even 64 pieces (breasts, wings, drumsticks, thighs). Both round and rectangular vats exist, and they come with a basket or rack system, ideal for preparing 64 pieces at once and simplifying production. Although there are few low-volume pressure fryer options, it’s worth asking about them when purchasing this type of equipment.
The Right Food for Each Type of Fryer
The list of dishes that can be prepared in a fryer is very long. Here are a few examples, besides French fries and chicken wings:
OPEN FRYER: beef fillet, various batters, green beans, pickles, bacon, mushrooms, anything you want extra crispy, frozen products
PRESSURE FRYER: bone-in chicken breast, pork chops, corn on the cob, fresh chicken wings, small whole potatoes, heavily breaded dishes
#2 You’re Unknowingly Introducing Harmful Elements into Your Frying Oil
Frying oil is one of the most expensive food products in the kitchen. If you don’t use it properly, you lose it. Fortunately, we know exactly which elements can harm the oil, and we know how to avoid – or at least fight off – these “enemies” of your oil.
To help identify them, remember the acronym HAMSS and you’ll be able to save money and improve the quality and lifespan of your oil.
HEAT
You can’t avoid it, but you can control it. When you’re not actively using the fryer, lower the temperature. Every time you lower the temperature, the oil’s usable lifespan increases exponentially. The best practice for lowering oil temperature is to use features like “Idle Mode,” which lets the oil cool passively instead of manually lowering the oil temperature.
AIR
Exposure to air degrades oil quality over time. Oxidation occurs when the oil comes into contact with air. Cover the oil with a lid when you’re not using it, such as overnight or outside peak hours – this will extend its usable life. Once filtered, there’s no need to run it through the filter again; doing so introduces even more air and increases oil degradation.
MOISTURE
Contact with moisture is the single biggest culprit in the deterioration of cooking oil. Everything you fry contains moisture, especially meat. The frying process draws moisture out of the food being cooked, and that moisture gets into the oil and breaks it down. There are precautions you can take to avoid introducing excess moisture into the oil. For example, always shake off any water or ice crystals before putting a product into the fryer.
SALT
Salt is like sand – it gets everywhere. Because salt breaks down oil and causes foaming, it’s best to avoid it near your frying oil. Never salt food directly over the fryer; instead, salt food on the prep table. Review your kitchen’s workflow to make sure food is seasoned as far away from the fryers as possible, and that salted food is properly drained before going into the vat.
SOAP
Soaps and detergents can break down oil very easily. Alkaline liquids, such as cleaning chemicals, create soap when combined with oil. That soap reacts with the oil and causes unpleasant flavors and smells, darkened color, and foaming. Only use cleaning solutions recommended by the fryer manufacturer, and follow the instructions carefully. Keep the lid closed, especially during cleaning, and always rinse with vinegar to neutralize the detergent.

Henny Penny Fryer Features
Setting the Henny Penny fryer to “Idle Mode” allows the oil temperature to drop when the equipment isn’t in use, avoiding overexposure to heat, which is very harmful to the oil.
Henny Penny fryers also include a “Melt Mode” function to prevent the oil temperature from rising too quickly, which would damage the oil. This feature gradually raises the oil temperature and extends the oil’s usable life.
#3 Oil Quality Testing Relies Too Heavily on Your Team
We know how costly oil is, and we also know that in the rush of a kitchen, especially during peak hours, standard equipment maintenance is often – understandably – forgotten. Tasks are usually prioritized to meet customer expectations. But when there’s downtime, having a process in place to check oil quality becomes very important.
So, what are your options?
There are less expensive methods, such as an oil color reference kit – essentially pre-filled tubes colored to represent the point at which oil should be discarded. Using these kits, you compare the color of the oil in the vat to the color on the tube and determine when it’s time to throw the oil out. There are also strips that can be dipped into the oil, with squares that shift from blue to yellow to indicate whether the oil should be discarded. The risk with both approaches comes down to the personal judgment of whoever runs the test. You’ll have to rely on a team member who understands the readings and acts accordingly.
Non-consumable oil testing methods include a portable option (a calibrated handheld device kept in a case and stored separately from the fryer) or a built-in oil measurement function integrated into the fryer itself. Although these options are more expensive, they’re far more objective than the earlier methods, which rely on the human factor.
From there, a team member just needs to press a button, read the result, and either keep using the oil or discard it. Although it’s a non-consumable option, there could be a replacement cost for the handheld device if it’s damaged or lost. For both non-consumable options, a schedule needs to be set up to make sure calibration stays accurate and you’re getting correct readings. These calibration checks can be done anywhere from once a year to every 2-3 years, depending on how heavily the equipment is used.

#4 Your Kitchen Doesn’t Have a Consistent Oil Filtering Routine
Oil comes into contact with those harmful elements every day, which is why it’s so important to have an oil filtering schedule. The key to making oil last is filtering it quickly and often, to remove anything harmful before it does much damage. Finding the optimal number of cooking cycles between filterings is the decisive step for maximum output. Any filtering is good, but productivity needs to stay as high as possible at the same time. There’s an efficient filtering schedule out there that will produce the best product and ensure the oil’s longevity.
One key element in optimizing filtration is a powder or pad that can be used to clean the oil once a day. Products like filter powder complement your existing filtering methods. This powder is added to the oil and works by attracting and collecting particles, making them too large to pass through the filter screen and separating them from the clean oil. Some of these products can double the oil’s lifespan, but make sure you pay close attention to the instructions. Using them for more than 10 minutes can actually damage the oil. This is a practice best done in small doses to protect your oil.
The Oil Filtering Formula
Knowing exactly how often to filter your oil can be tricky, since there’s no exact rule. Using this basic formula, however, you can make a smart decision about oil quality:
TIME + MOISTURE + RESIDUE + TEMPERATURE = OIL DEGRADATION
The more degraded the oil, the greater the need for filtering.
These two examples, using our formula, can help you set some guidelines:
Bone-in Chicken Thighs
cooking time 11 min + high moisture + high amount of residue + 160-degree temperature = high degree of oil degradation (filtering should be done after 4-6 cycles)
Frozen French Fries
cooking time 3 min + low moisture + minimal to zero residue + 175 degrees = low degree of oil degradation (filtering should be done after 12-18 cycles)
#5 You Haven’t Given Your Team Adequate Training
You’ve invested heavily in quality kitchen equipment, and while that equipment is very important, it isn’t enough on its own for your business.
It’s important to properly train your staff, and if you fail to do so, you risk lowering the quality of your dishes, which in turn means poorer service for customers and, ultimately, costs your company money. Here are a few situations where inadequate staff training can impact your business:
- Employees who are afraid of or unsure about the filtering process will avoid the task. Poor filtering leads to lower-quality dishes and higher costs.
- Incomplete training can result in staff relying on other team members for help, pulling them away from their own duties and disrupting kitchen efficiency.
- Inefficient workflow caused by a lack of staff training leads to delays in operating and maintenance procedures, even basic ones, resulting in longer wait times for customers, which can drastically affect their experience.
- Failing to properly monitor oil quality and make the right calls about when oil should be discarded or kept can lead to throwing out oil too early, which is very costly. On the other hand, oil kept too long has a major impact on food quality.
Additional Henny Penny Fryer Features
Setting the “Filter Lockout” function on Henny Penny fryers establishes a limit oil temperature. This prevents the unit from operating when the oil needs filtering, ensuring you always cook with properly filtered oil.
The “Filter Tracking” function, available on some Henny Penny fryers, can be set to automatically alert the operator when the oil needs filtering. This is the simplest way to make sure the oil is filtered properly.
This function, available on some Henny Penny fryers, prevents oil from being topped up during the frying process. The fryer will know when the oil level in the vat drops and will automatically refill with fresh oil, keeping the oil level constant as you cook. This function also helps extend oil life on equipment with lower oil volumes.
This built-in function precisely measures the exact quality of the oil after every filtering, without requiring any extra work or time from your staff.
“Prime filter powder” adds an extra layer of filtering efficiency and can double the oil’s usable life.